Why LED Diffusers Turn Yellow (and How to Stop It)
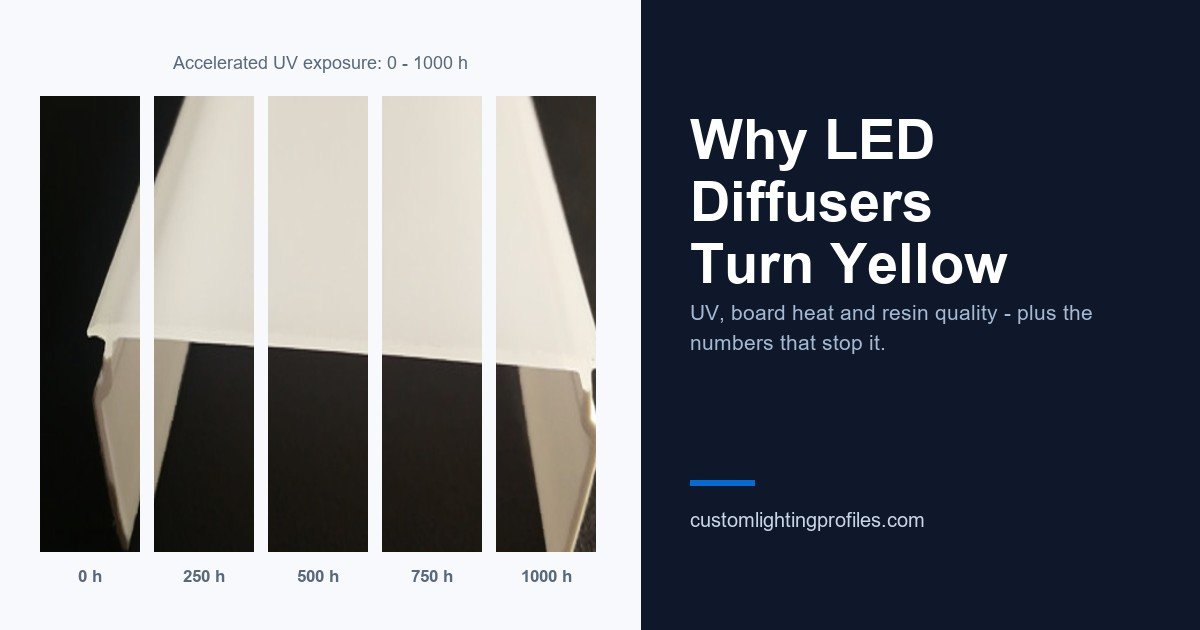
Abstract: A linear fixture that looked clean at handover comes back from a site visit looking amber at one end, and the complaint lands on the LEDs. In most cases the LEDs are fine and the diffuser has yellowed. Four mechanisms actually drive LED diffuser yellowing: UV photo-oxidation, thermal ageing, board-level hot spots and resin quality. This article gives the acceptance numbers worth writing into a specification instead of adjectives like “UV resistant”, compares how PMMA and PC each age, and closes with six contract clauses and three cheap incoming-QC checks that catch the problem before it leaves your factory.
Nine months after handover the maintenance call comes in: “the lights have gone yellow.”
Usually the LEDs are fine. What has changed colour is the extruded LED diffuser sitting a few millimetres above them. By the time the colour is visible to the eye, the fixture has already lost transmittance, shifted correlated colour temperature and started to look inconsistent from one section to the next.
Yellowing is the predictable result of chemistry that nobody specified against. Four mechanisms drive it, and each one has a number you can put in the drawing instead of the phrase “UV resistant”.
Four mechanisms, two of them UV
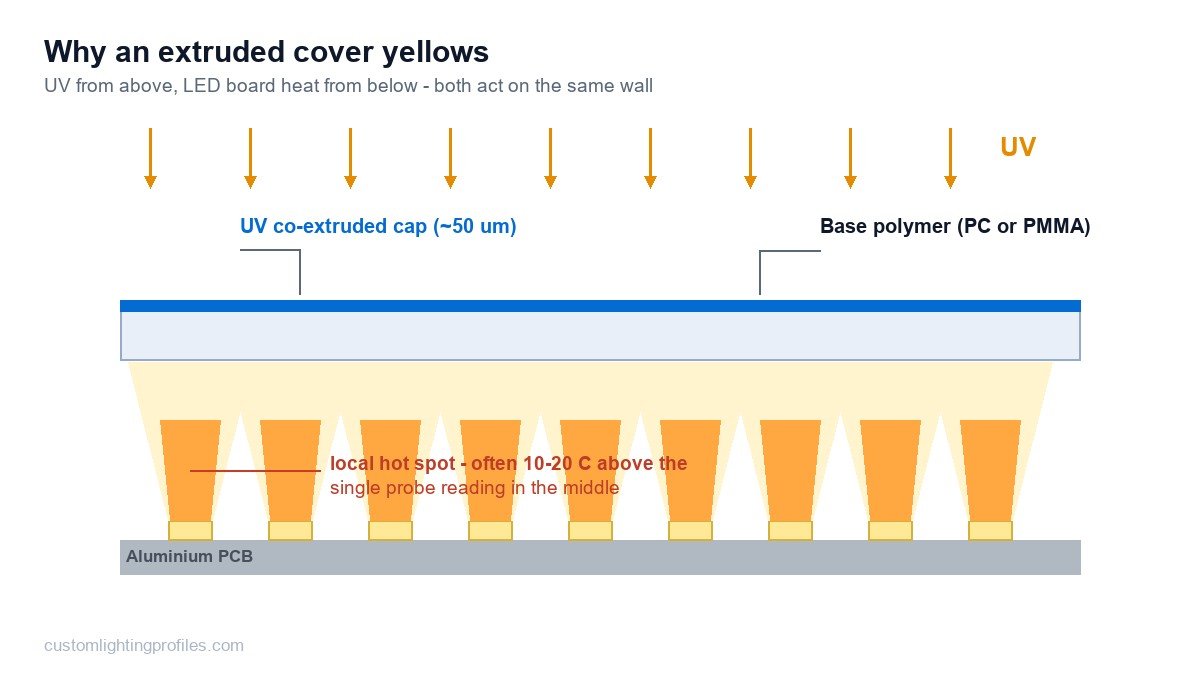
1. UV photo-oxidation. Sunlight through a window, a skylight, or even high-bay fixtures under roof glazing delivers enough UV to break polymer chains at the surface. Polycarbonate absorbs strongly below roughly 380 nm and that absorption is exactly what starts the yellowing reactions; PMMA is intrinsically far more stable in the same exposure. This is why two covers that look identical in the sample box age very differently on site.
2. Thermal-oxidative ageing. Colour shift is a function of temperature history, not of today’s reading. The numbers to keep in mind as *application limits, not material certificates*: PMMA grades commonly used for lighting carry a continuous-service ceiling in the 80–90 °C range, while PC grades sit nearer 120–130 °C. Above those, yellowing accelerates sharply. A diffuser mounted close to a high-power board can see material temperatures nobody measured at design time.
3. Board-level hot spots. The average enclosure temperature is not the number that matters. Directly above each LED cluster the local surface runs hotter, and it is that local temperature, often 10–20 °C above what a single probe in the middle of the fixture reports, that sets the ageing rate. This is why yellowing frequently appears as a repeating pattern that matches the LED pitch.
4. Resin quality and additives. Unagreed regrind, residual monomer left from incomplete polymerisation, and a marginally specified flame-retardant package all produce covers that pass incoming inspection and yellow early. This is the cheapest failure mode to prevent and the hardest to prove afterwards. For a wider view of how these choices surface as price differences, see our breakdown of lighting cover quote cost structures.
Specify numbers, not adjectives
“UV resistant” is not a specification. Nobody can test against it. These can all be verified at incoming inspection:
| Metric | Typical acceptance used in practice | What makes it meaningful |
|---|---|---|
| ΔYI after accelerated weathering | Commonly ≤2–3 for premium PMMA, ≤4–6 for UV-capped PC | Must state cycle and hours (see note below) |
| Luminous transmittance retention | ≥90–95% of initial value | Measure with the same integrating setup each time |
| Colour shift ΔE*ab | ≤2–3 against the approved master | Catches visible mismatch between lots |
| Initial YI (absolute) | Recorded as the baseline | Without a baseline, ΔYI has nothing to reference |
The clause that decides most disputes is the test method. “QUV 1000 hours” is meaningless without the cycle. Reference the standard you actually want, ASTM G154 for fluorescent UV exposure or ISO 4892 for xenon-arc, together with the specific cycle, irradiance and whether condensation is included. Two suppliers running “1000 hours” under different cycles produce numbers that differ by a multiple, and both are telling the truth.
Then state where the measurement is taken. Measure at the same point on the profile every time, cross-web as well as along-length, because a co-extruded UV cap protects the exterior face far better than the cut edge or a snap-fit groove.
PMMA vs PC: how each one actually ages
| PMMA diffuser | PC diffuser | |
|---|---|---|
| Intrinsic UV stability | High: yellows slowly even without a cap | Moderate: yellows measurably without protection |
| Initial transmission | Typically the higher of the two | Slightly lower, closing as haze options develop |
| Continuous service temperature | Commonly ~80–90 °C | Commonly ~120–130 °C |
| Impact strength | Lower, more brittle in section | The reason to choose PC at all |
| Usual protection route | Often used un-capped | UV-capped co-extrusion, typically tens of µm |
Material selection is not a one-line decision. If you have not already read it, our comparison of PC vs PMMA for LED light covers covers the trade-offs in more depth, and how to choose a material for LED diffusers walks through the decision sequence.
Where a fixture lives outdoors, near glazing, or runs hot, PMMA or a UV-capped PC co-extrusion belongs in the base specification rather than the options list. Unprotected PC in those positions is the combination that yellows early.
Where the UV-capped co-extrusion earns its cost
A co-extruded UV cap adds a thin, heavily stabilised layer over a cheaper, tougher core. It costs more per metre and it is almost always worth it for extruded PC covers in daylight-exposed applications, because the alternative failures cost more than the delta:
- Spray-coated UV protection abrades during handling and cleaning, and coverage at the snap-fit grooves is uneven.
- Masterbatch-only stabiliser in the bulk protects the whole section but wastes expensive additive where no UV reaches it.
- No protection at all is what the lowest quote usually assumes.
A cap with a specified thickness is also something you can measure at incoming inspection, which a vague claim is not.
Six clauses worth writing into the contract
- Name the resin grade in the drawing and state that any change needs written approval. “PC” is a family, not a part number.
- State the regrind position explicitly: permitted or not, and at what percentage. Silence is read as permission.
- Specify the protection method and thickness, e.g. co-extruded UV cap of X µm on the exterior face. Not “UV resistant”.
- Cap the part’s operating temperature together with how it is measured and where the probe sits, using the mean enclosure value plus an allowable local hot-spot rise.
- Write the acceptance numbers down: ΔYI, transmission retention and ΔE, each with its standard, cycle and duration. Update your drawing with the information a lighting profile drawing must carry.
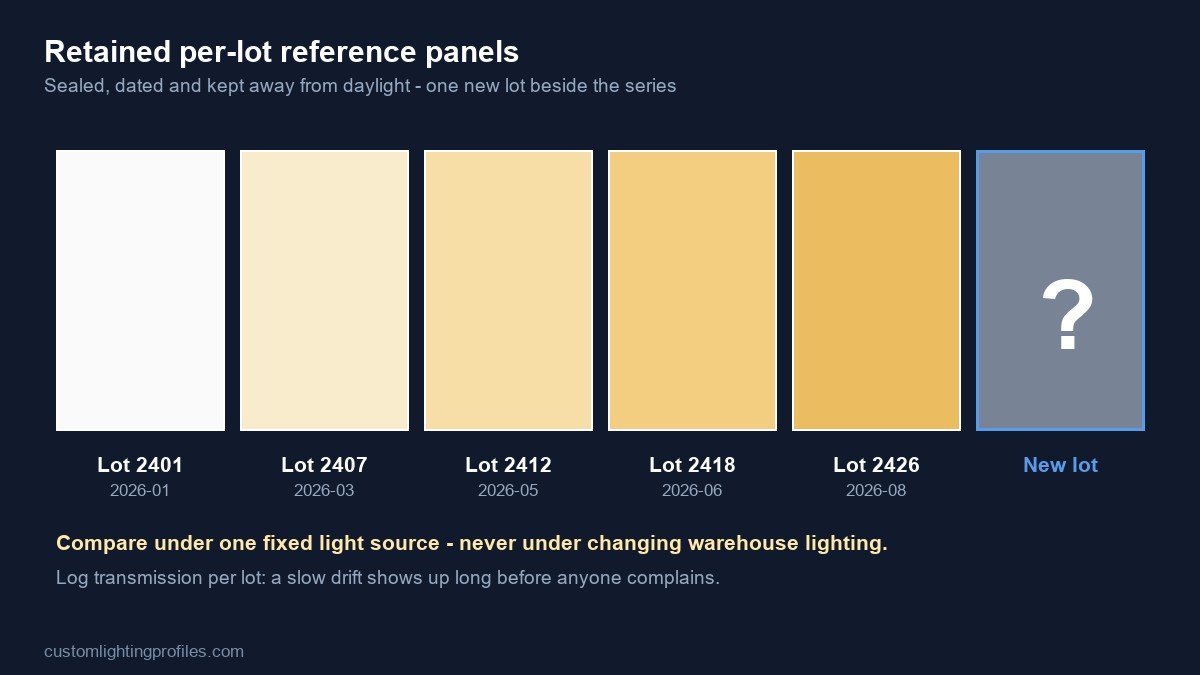
- Require per-lot retained panels, sealed and dated. This single clause is what makes any future dispute decidable.
Three incoming checks that cost almost nothing
You do not need a laboratory to catch most yellowing problems early.
- Compare against the retained reference under one fixed light source. A single booth, one lamp, same angle each time rather than whatever the warehouse happens to be lit with. Human colour matching under consistent conditions is surprisingly sensitive.
- Measure transmission through the profile, even crudely: a fixed LED, a fixed distance, a lux meter. Log the reading per lot. A slow drift shows up long before anyone complains.
- Record lot and date on the retained panel and store it away from daylight in the same conditions as previous lots.
Run those three and you will know within one delivery cycle whether your specification is being honoured.
Getting this written into a real enquiry
Diffusers for daylight-exposed or high-temperature fixtures need the resin, the cap and the acceptance numbers agreed before tooling rather than argued about after installation. Send us your application conditions (location, expected enclosure temperature, target lifetime, required ΔYI), and we will quote custom linear diffuser profiles with the UV protection actually specified, alongside prismatic diffusers and LED tube covers in comparable grades.
Start from the full product range, or request a quote with your drawing attached.
What to write into the spec so yellowing is not a warranty argument
Yellowing is not a defect you can argue away after the fact — it is either specified or it is not. Once a luminaire is installed, nobody can prove which batch of resin was in the profile or how much UV it saw in transit. The only enforceable moment is the drawing and the purchase order, so the specification has to carry four things.
| Clause | What it should say | Why it is enforceable |
|---|---|---|
| Exposure class | Where the profile sits: inside a sealed luminaire behind glass, in a semi-open fixture, or in direct daylight. Say which. | Everything downstream depends on it. A profile for a sealed troffer and one for a canopy fixture are not the same purchase. |
| Stabiliser requirement | Whether the resin must be a UV-stabilised grade, and whether stabilisation is in the bulk or in a co-extruded cap layer. | Two constructions with the same base polymer behave very differently. Naming the construction removes the ambiguity. |
| Colour drift limit | A measured limit in ΔE against a retained reference sample, with the interval (for example, at first article and at each repeat order). | A visual “no visible yellowing” clause cannot be tested. A ΔE number against a retained sample can. |
| Documentation | Which documents ship with the order: material data sheet, batch reference, and any flame or compliance documentation the market requires. | Without a document trail, a year-two claim is your word against theirs. |
Four ways a yellowing specification fails
What to put on the drawing
- Exposure class for the installed product — sealed, semi-open, or direct daylight. One line, and it drives the material conversation.
- Base polymer and whether a UV-stabilised grade is required, plus whether stabilisation is bulk or a co-extruded cap.
- Wall thickness at the thinnest point, not only the nominal. Thin corners are where ageing shows first.
- Colour drift limit in ΔE against a retained reference, with the measurement interval.
- Transmittance target, stated as a range rather than a single number — we work across roughly 0 to 97 % depending on the diffuser construction, and a single figure usually means the optical design has not been settled yet.
- Which documents must ship with the batch, so the clause can be checked when the container arrives rather than in year two.
Related reading: polycarbonate as a lighting material, the PC vs PMMA selection matrix, and thermal limits of PC and PMMA in fixtures. Compliance documents are listed on the certificates page.